2012 – A new year, new beginnings & a whole lot more!

Standard

Well it’s another year, and lots to happen I’m sure.

First Day of Kinder

Emma starts kinder this year and had her first day on Tuesday for a few hours so she can be eased into it….not that i think she needs it, but, that’s what they do!  She had a ball, played lots of games, did some reading, made friends and generally enjoyed herself….and brought Mum home a present to deal with…NITS!   Urghhhh, my head just itches saying that word!  I can’t believe one day and she has them!

Dealing with the nits!


Grade 4


Cayden has started back at school, Grade 4.  Man time is flying!  He is enjoying the new format of his school.  They are in a community of Grade 3 through to Grade 6.  It works a bit like high school where they have different teachers for different subjects and they get split up into groups…I’m assuming it is worked out on their abilities instead of the grade they are in.  I’m not too sure because Cayden really doesn’t tell me much and i don’t think he really understands anyway!


I’m back at sewing….my goal this term to to go every week.  Last term I think I managed 4 out of the 10 weeks!  This term will be better!  I’m doing a block of the Month called Love, Peace and Appliqué.  It’s very sweet, and hopefully will teach me something too!

Oops!

Standard

I’ve been very slack haven’t I!?!?!

With a gentle (?) reminder from friends, I thought it was time I resurrected this blog.  So where to go from here?  I think I’ll just start again and won’t bore you with the past months happenings.

Sunday 11th Sept.

It’s a nice quiet day today…we have a little girl that is feeling a little off colour having thrown up a few times this morning (just what I wanted at 6.30 this morning).  Both kids are in watching a movie with Dad and I’m setting up things for the next week.

A meat stew is currently on the stove, cooking itself into tenderness and into waiting pie cases.  I was chatting with Mum this morning and asking her about my Nana’s meat pies.  My Nana use to own a diner in a little place called Willaura and was a great cook, catering for the local area.  Nana’s pies were well regarded!  Asking mum about them this morning I found out that the ingredients were mince meat, gravox and water and cooked together, chilled and then put into a rough puff pastry.  It got me thinking to how our tastes have changed over the generations.  Nana was cooking in the 1950’s, so 60 years on, our tastes and expectations have changed drastically.  my stew this morning that is destined for pies has chunks of meat, carrot, celery, onion and stock, cooked for approx 2hrs.  Not hugely different, but it has more veg and more flavour.  Our main meals have changed too…I was brought up on meat and 3 veg, generally the vegetables were overcooked and we always had potato and it was generally mashed.  I serve my family a bigger variety of food.  We always have a salad. Chicken, beef, pork, fish all make an appearance at our table, at least once a week and we try to have a meat free meal once a week too.  Vegetables are lightly cooked or served raw.  It is interesting to see the changes…simply in the produce that is now available.  Friday night we had Gyoza’s, home-made; who would have thought we would be able to get fresh wonton wrappers from the local Asian store 10 years ago?

Well, I’d better go and finish off the pie mix and get the washing and menu planning done for the week.

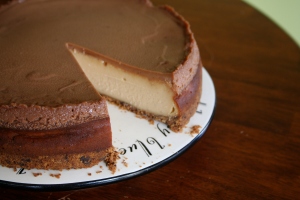
Peanut Butter Cheesecake

Standard

Morning tea at the Clifford’s for our weekly catch-up, coffee and chat.  I saw this recipe being done on Nigella Lawson’s Kitchen and thought it looked pretty good, so in need of an excuse to try it, thought our weekly catch-up would be as good a time as any!  Cheers girls!

Recipe from Lifestyle Food, Nigella Lawson

Chocolate Peanut Butter Cheesecake

  • Ingredients should be at room temperature before you start.

For the base:

  • 200g digestive biscuits
  • 50g salted peanuts
  • 100g dark chocolate chips
  • 50g soft unsalted butter

For the filling:

  • 500g cream cheese
  • 3 eggs
  • 3 egg yolks
  • 200g caster sugar
  • 125ml sour cream
  • 250g smooth peanut butter

For the topping:

  • 250ml sour cream
  • 100g milk chocolate chips
  • 30g soft brown sugar
  • 1 x 23cm springform tin
  1. Preheat the oven to 170°C, then process the biscuits, peanuts, dark chocolate chips and butter for the base in a food processor. Once it comes together in a clump, turn it out into a springform tin and press into the bottom and up the sides to make the crunchy crust. Put in the fridge while you make the filling.
  2. Process the filling in the cleaned or wiped-out processor bowl, putting in the cream cheese, eggs and egg yolks, sugar, sour cream and peanut butter and whizzing to a smooth mixture.
  3. Pour and scrape the filling into the base in the chilled springform tin and cook for 1 hour, though check after 50 minutes. The top – only – should feel set and dry.
  4. Take the cheesecake out of the oven while you make the topping. Warm the sour cream and chocolate with the brown sugar gently in a small saucepan over a low heat, whisking to blend in the chocolate as it melts, and then take off the heat.
  5. Spoon and spread the topping very gently over the top of the cheesecake, being as careful as you can in case you break the surface of the cheesecake. (Not that anything bad will happen; you’ll just have chocolate marbling the cake a bit.) Put it back in the oven for a final 10 minutes.
  6. Once out of the oven, let the cheesecake cool in its tin and then cover and put into the fridge overnight. When you are ready to eat the cheesecake, take it out of the fridge, just to take the chill off: this will make it easier to spring from the tin.
  7. Don’t let it get too warm, though, as it will become a bit gooey and be hard to slice.


Blueberry Buckle – Playgroup morning tea!

Standard

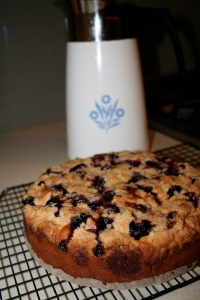
It’s Thursday and its Emma’s favourite day of the week, because Thursday means playgroup day!  This week it’s time to try a new recipe on the Mum’s…Blueberry Buckle.  It looks so yummy and Cayden is most disappointed he is not going to get some!  This recipe is from the program Sugar on Foxtel hosted by Anna Olsen.  She has some of the yummiest stuff!

Blueberry Buckle

Ingredients

Cake

  • 1/2 cup unsalted butter, at room temperature
  • 1/2 cup sugar
  • 1 egg
  • 1 teaspoon vanilla
  • 2 cups all purpose flour
  • 2 1/2 teaspoons baking powder
  • 1/4 teaspoon salt
  • 1/2 cup milk
  • 2 cups blueberries

Streusel Topping

  • 1/3 cup sugar
  • 1/3 cup flour
  • 1/2 teaspoon cinnamon
  • 3 tablespoons unsalted butter

Directions

Cake

  1. Preheat oven to 350º F.
  2. Cream together butter and sugar until pale yellow and creamy. Add egg and vanilla and beat in.
  3. Sift together flour, baking powder and salt. Add alternately with milk until incorporated. Scrape batter into cake pan and spread evenly. Sprinkle blueberries on top of batter.

Streusel Topping

  1. In small bowl blend sugar, flour and cinnamon. Cut in butter with your fingers until crumbly and no large bits of butter are visible. Sprinkle on top of berries.
  2. Bake for 45-50 minutes. Allow to cool before serving.

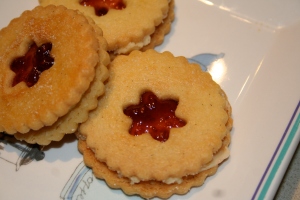
Jam Rings

Standard

I’ve been doing a bit of research all in the name of Christmas presents…so made these deliciously yummy biscuits.  Darren thinks they are like a fancy Jam Fancy, I think they are more like a Monte Carlo.  They are easy to make, however a little time consuming!

Jam Rings

Ingredients

225g butter, softened
140g caster sugar, plus extra for sprinkling
1 egg yolk, lightly beaten
2 tsp vanilla extract
280g plain flour
1 egg white, lightly beaten
pinch of salt

Jam Filling

55g butter, softened
100g icing sugar
5 tbl strawberry or raspberry jam

Method

  1. Put the butter and sugar into a bowl and mix well.  Add egg & vanilla, beat well.  Sift together flour and pinch of salt and mix until combined.  Halve the dough, shape and wrap in plastic wrap and chill for 30 – 60 minutes.
  2. Preheat oven 190C.  line 2 baking sheets with baking paper.
  3. Unwrap dough and roll between two sheets of baking paper until approx ½ cm thick.  Cut out biscuits with round cutter and place on tray.  Then cut out the centres of half the biscuits. Place on baking tray with room between each biscuit.
  4. Bake for 7 minutes. Then brush biscuits with beaten egg white and sprinkle with caster sugar.  Bake for a further 5 minutes, until golden brown.  Leave to cool 5 – 10 minutes on tray then lift with spatula to cooling rack.
  5. Jam Filling: Beat the butter and icing sugar together in a bowl until smooth and combined.  Spread the buttercream over the whole biscuits and top with a little jam.  Press the cookie rings on top and press gently together.

Everyday Biscuits

Standard

I refuse to buy biscuits from the supermarket, (except for my tim tams that I have once in a blue moon – can’t make them!), as I prefer to know what actually goes in the mouths of my family.  As such, I’m learning to have a steady supply of everyday biscuit mix that I can change to suit the tastes and whims of the family.  This one is good for that and I’ve rolled them in 100’s and 1000’s, flaked chocolate, sprinkles, coconut.  I’ve pushed chocolate buttons, freckles, jam, nuts and the list goes on.  Here is the basic recipe that I found on taste.com.au

Thumbprint Cookies

Ingredients

  • 180g unsalted butter, softened
  • 220g (1 cup) caster sugar
  • 1 egg
  • 75g (1/2 cup) self-raising flour
  • 1 1/2 cups plain flour
  • Chocolate freckles, to decorate

Method

  1. Preheat oven to 180°C. Line a baking tray with non-stick baking paper.
  2. Place the butter and sugar into the bowl of an electric mixer and beat until pale and creamy. Add the egg and beat well.
  3. Stir in the flours and mix to form a dough. Roll 2 tablespoons of dough into a ball and flatten onto the baking tray. Press your thumb into the centre of the dough to make a hole (do not go all the way through). Repeat with the remaining dough.
  4. Press a chocolate freckle into each hole and bake for 10-12 minutes or until golden brown.
  5. Set aside on wire racks to cool.

Notes:

  • I don’t actually flatten or put a thumbprint in the biscuits unless I’m putting jam in them.  Instead I press the chocolate buttons or freckles in the biscuit, or I’ll roll the top of the biscuit in the sprinkles, chocolate shavings.
  • I also add Vanilla extract in at the creaming butter and sugar stage to give extra yummy taste!

Brownie Walnut Cookies & Other things!

Standard
Time for a new recipe… made these last night and they are pretty good according to Darren’s workmates!

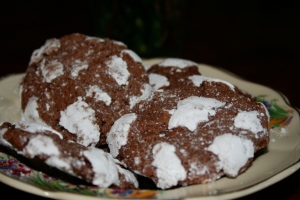
Brownie Walnut Cookie

Brownie Walnut Cookies

Recipe taken from www.familyfun.go.com

Notes:  Make sure you allow enough time for this recipe as you need to chill this for 3-4 hours.  Unlike myself who started this recipe at 8pm last night!  It’s amazing how well a freezer does!

Ingredients

  • 1/2 cup unsalted butter, softened
  • 6 ounces unsweetened chocolate, coarsely chopped
  • 2 cups sugar
  • 4 large eggs, at room temperature
  • 2 teaspoons vanilla extract
  • 1 cup walnut pieces or halves
  • 2 cups flour
  • 2 teaspoons baking powder
  • 1/2 teaspoon salt
  • Confectioners’ sugar, for coating

Instructions

  1. In the top of a double boiler, melt together the butter and chocolate over very low heat. Remove the inner pan and allow the mixture to partially cool, then stir it until smooth.
  2. In a bowl, beat the sugar and eggs with an electric mixer at high speed until light and airy, about 4 to 5 minutes. Blend in the vanilla extract and partially cooled chocolate. Chop the walnuts very fine (a food processor works well for this) and stir them into the chocolate mixture.
  3. Sift the flour, baking powder, and salt into a medium bowl. Stir the dry ingredients into the chocolate mixture half at a time, until the dough is evenly mixed – it will be quite soft. Cover and refrigerate the dough for 3 to 4 hours.
  4. Heat the oven to 325 degrees. Grease 2 large cookie sheets or line them with parchment paper. Put about 1 cup of Confectioners’ sugar in a small bowl. Now shape the dough into 1-1/2-inch-thick balls. Generously coat each one with confectioners’ sugar and place it on a baking sheet, leaving about 3 inches between cookies. Bake the cookies on the center rack, 1 sheet at a time, for about 13 minutes. When done, the cookies will have puffed and will feel very soft to the touch. Do not overbake.
  5. Cool the cookies on the sheet for 15 minutes, then transfer them to a wire rack and let them cool thoroughly. TIP: To lengthen the shelf life of these cookies, refrigerate them for 1 to 2 hours, then wrap them individually in plastic wrap. Makes 24 to 30 cookies.

OK….on to other things!

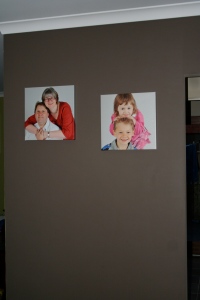
Jen asked in a previous post to show the canvas’ on the green wall in our dining area.  These canvas’ are from snapfish and we are so happy with them.  Tania Tanti photography did the photos…these photos are 2009, except for Emma which was taken March this year at playgroup.

Dining room canvas'

and these ones are 2010 and I only received this morning.  I love them!

Kitchen canvas'

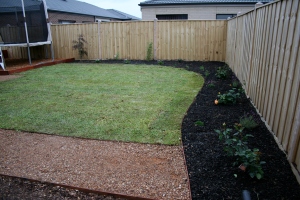
Our Backyard has been landscaped.

Standard

My first flower in my new garden!

It’s been almost 9 months since we moved into our new home and we are finally starting to see our environment come together.  It has been a dream of mine to start a veggie garden for a good couple of years now and this is now finally coming together.  I feel like I’m following in my Mothers footsteps (she finds it very amusing I might add!), back on the farm we had a huge veggie patch and a large beautiful garden.  I’m finding as I’m getting older I’m also craving the things I had around me as a child.  It’s a little hard to re-create that on a suburban block…but at least it will be a scaled back version!

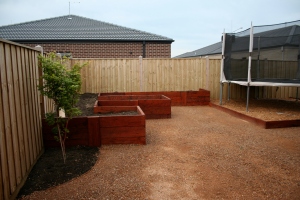
So in our small backyard we have a veggie garden…

Veggie Garden

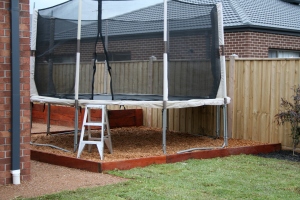
A place for the trampoline…

Kids play area

And a place for lawn and pretty flowers…

Lawn and garden

It has all come together very nicely.  And come early next year we will add decking so we can have a nice area to sit outside and enjoy it all.

Curtains … finally!

Standard

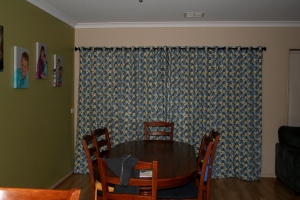
I’ve been putting it off and putting it off for so long, but I finally got a nudge along (thanks Tania!) to get my butt into gear and make the curtains for the dining/family room.  I’d been putting off for so long as it is such a big window and I would need so much material that I was a tad daunted…plus the fact that making curtains previously had not worked out exactly the way I planned!  6 of the curtains made were a tad short for the windows….it’s what happens when not getting correct measurements and only working from the plan, Oops!  But anyway I digress, the curtains are now made and hanging and even hemmed!  I’m pleased how they have come up and they really set the room off, now just have to make a pelmet for the other window and it’s finished!  A photo….(of course!)

Dining room curtains


Now to get organised and do the pelmets for the kids rooms and the ties for all the curtains!   Busy, busy, busy.

To go grey or not too…

Standard

That is the question that I asked myself about 6 months ago.  I’ve been slowly going grey over the past 10-12 years (getting faster as I tipped 40!) and have been dying my hair for that long.  It’s fun, but oh so damn expensive and at the rate my hair grows I end up with the skunk stripe after about 3 weeks,  so I was asking myself if it was worth it or not.  My Mum went salt and pepper in her 40’s and now is a lovely shade of steel grey and it really suits her…but was I ready to admit I was getting older and risk making myself look even older?  Then I thought, well, I’m comfortable being the age I am, certainly wouldn’t want to turn back the clock, so why hide what nature is telling me?  So I made the decision…grey it will be and if i really can’t handle it I can always dye it again!

So here is me about 6 months ago …

Approx March 2010

And now 7 months later …

Taken 2 weekends ago

I have to say I’m pleased with how it is growing out.  It will be interesting to see what it looks like once there is no dye left!